|
Tools Required
Procedure
- Install the Descent Manager and Project Mars utilities.
- Open Windows Explorer, and navigate to your Red Faction game directory.
- Look for a file named “tables.vpp”. Right-click on that file, and click Copy.

- Navigate to your C:\TEMP, C:\WINDOWS\TEMP, or some other directory you can use as a workspace and Paste a copy of this file into that directory.
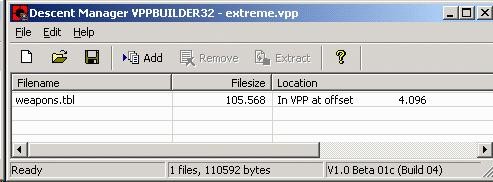
- Click twice on your copy of the “tables.vpp” file. The Descent Manager utility should open automatically, and show you a list of files contained within the VPP file.
- Look for the file “weapons.tbl” in the list. When you find it, click on it, and then click Extract from the menu. When the directory browser appears, choose the same directory in which you installed the Project Mars utility in step 1. This file needs to be there, otherwise Project Mars will return an error message. Proceed with the extraction.
- From the upper-right corner of the Project Mars screen, choose the 12mm handgun from the list (for this example; after you’re more familiar feel free to experiment). Once you do you’ll notice a bunch of attributes will appear onscreen.
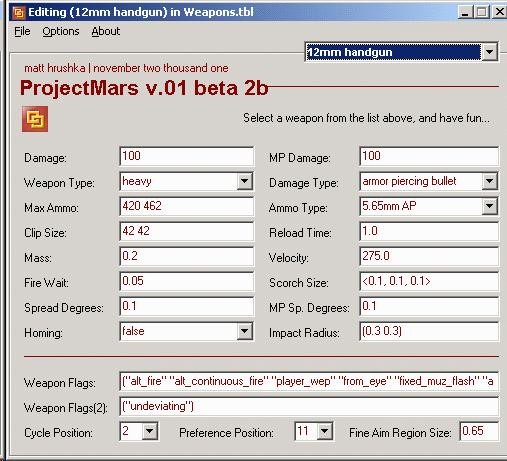
- Modify some of the attributes. Increase the damage, beef up the max ammo and clip size values. Decrease the Fire Wait and Reload Time attributes; these will allow for unnaturally rapid fire of the weapon.
- Experiment with the Weapon Flags settings carefully. I will update this information as I find out more about how to tweak these, but until then be careful, because certain attributes go with certain weapon and ammo types, and if they’re out of sync the game will exit with an error moments after you try to open it.
In this example, to make my pistol function similarly to the assault rifle (e.g. continuous fire), I just copied the Weapon Flags and Weapon Flags(2) attribute fields from the assault rifle attribute screen to this one; I also changed the Weapon Type, Damage Type, and Ammo Type to match the characteristics of the assault rifle.
- After making changes to the attributes, Save the file over the existing “weapons.tbl” file in the Project Mars program directory.
- In the Descent Manager utility, create a new file.
- Go to Windows Explorer, and click and hold the “weapons.tbl” file you just modified.
- Drag the file from Windows Explorer into the Descent Manager file list. The file should appear in the list.
- Click on File => Save, and save the VPP file into your Red Faction\user_maps\multi directory. Give it any name, doesn’t matter.
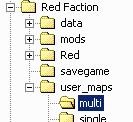
This is the key step that lets you use tweaked weapon attributes in multiplayer. Any valid VPP files the game finds in this directory are loaded in and override your default settings.
- Run the game. If the game immediately bombs out with a “critical error” about 30 seconds in, repeat the above steps, and be a bit more conservative. In my experiments these problems are caused by my lack of knowledge of how to structure the Weapon Flag attributes.
Trial and error is helpful but tedious; hopefully someone has figured out the rules of modifying the attributes properly, this is something I’m too lazy to bother with.
|
|